Showing posts with label recipe. Show all posts

Jul 12, 2011

Perfect brown rice

Rice is generally a side dish used on a daily basis in latin culture.  Here, I'll share how I make it everyday.  First, brown rice, shown above, then white jasmine rice, shown below.

For brown rice:
YOU WILL NEED
1 cup uncooked brown rice
garlic OR minced onions
1 oregano leaf
salt to taste
3 cups water
Extra virgin Olive Oil (EVOO), use canola if you want to cook on high
Pot

MAKE IT
1.  Pour in some EVOO to cover the bottom of the pot lightly. Then, pour in the desired amount of rice you'll be cooking.  Rice can mutiply in size up to 6 times the uncooked amount.  Stir the rice and toast in the oil on medium heat. When cooking with EVOO, never raise the temperature to high.  I generally cook 1 cup per meal.  You can toast the garlic or onion in this phase too.
2.  After the rice is all well toasted and covered in oil, pour in water.  Since I cooked one cup rice, I pour in 3 cups water.  So if you cook 2 cups rice, then 5 cups of water.  3 cups of rice, then 6 cups of water...and so on.  The numbers keep rising: generally 1 part rice, and 2 parts water.
3.  Add the salt to taste and the oregano leaf.  Do NOT stir, this will make the rice mushy and sticky.  You want it to seperate, and stay fluffy on it's own.  This is why it's important to let it toast properly.
4.  Let it boil and keep an eye on it until all the top grains are fully cooked.  Be careful not to let the bottom burn, or else everything will taste burned.  This takes lots of practice so don't give up ;-)


Jasmine White rice:
YOU WILL NEED

1 cup uncooked jasmin rice (or white rice)
garlic OR minced onions
2 table spoons Tomato sauce (optional for color mostly)
1/2 chicken broth tablet
salt to taste
3 cups water
Extra virgin Olive Oil (EVOO), use canola for high heat
Pot

1.  Pour in some EVOO to cover the bottom of the pot lightly. Then, pour in the desired amount of rice you'll be cooking.  Rice can mutiply in size up to 6 times the uncooked amount.  Stir the rice and toast on medium heat and let it get brown, not light brown, actual brown on it's edges. When cooking with EVOO, never raise the temperature to high.  I generally cook 1 cup per meal.  You can toast the garlic or onion in this phase too in the same pot.
2.  After the rice is all well toasted and covered in oil, pour in spoonfuls of tomato sauce and the water.  Since I cooked one cup rice, I pour in 3 cups water.  Add the chicken broth tablet, raising the amount per water being used.  Also, if you cook 2 cups rice, then 5 cups of water, one chicken broth tablet.  3 cups of rice, then 6 cups of water, still one full tablet...and so on.  The numbers keep rising: generally 1 part rice, and 2 parts water.
3.  Add the salt to taste and the oregano leaf.  Do NOT stir, this will make the rice mushy and sticky.  You want it to seperate, and stay fluffy on it's own. This is why it's important to let it toast well enough.  I also added green beans to this side dish on this day.
4.  Let it boil and keep an eye on it until all the top grains are fully cooked. Be careful not to let the bottom burn, or else everything will taste burned.  This takes lots of practice so don't give up ;-)

HELPFUL TIPS: If your rice starts to get dry, lower the heat, and add a little bit of water to cover the bottom and save it from burning.  You can also just cover this with a lid as it starts to cook from the beginning, making sure it does get sticky.

Jul 11, 2011

Black beans, less-gas style!

My mother always cooked black beans at home and pinto beans too.  Through the years, with my dad getting very well acquainted with healthier habits and tricks, he read of a way to cook beans in a way to reduce gassy effects on people. Ever since then, my dear mother has cooked them as such and taught us that same way. This technique can be used for all types of beans to reduce the effect bloating and gas.  Remember that beans are a great source of fiber, iron, and protein!
PERFECT!

YOU WILL NEED
dry beans ready to cook
water
NOT THIS!
cooking pot, with lid, NO openings!
salt to taste
garlic cloves, one tooth (or powder if you REALLY don't have the real deal)


MAKE IT
1. Prepare the day before you want your beans: pour out the uncooked beans in the pot you'll be using, rinse them and pour out the water.
2.  Fill up the pot with water.  Let this sit overnight (or at least 6 hrs) in water, no lid. This process lets the beans release their "gassy" qualities into the water, not absorbing them at all naturally!
3.  In the morning, or after a minimum of 6 hours, pour out all the water the beans were in.  I leave my pot on the cool stove overnight...
   COOL FACT: you'll notice before you pour out the water, that the water is slightly bubbling...it's gas in it, not in the beans anymore!  It was all released into the water!  Now, get red of that water and do a final quick rinse of the beans.
4.  Fill up the pot and newly-rinsed beans with water again.  This time fill up to one third more of the bean's mass and sprinkle in some salt and one garlic tooth....

so if you have 3 cups of beans, then 4 cups water.  If you have 6 cups of beans, then 8 cups of water.  Get it?  I rarely measure, but this is the general rule so I just eyeball it and cook enough for the week.

5.  Finally, cover your pot of ready-to-cook beans with the pertaining lid, making sure it seals all around.  You want the beans to cook in their own vapors and flavors.  If you don't have a lid without holes, you can cover the pot with just enough foil to cover over all edges and then put your lid on.  Slow-cook, below medium heat, and check on them every 2 hours or so. They should be ready to eat in another 5-6 hours and super delicious!  You can use a clean fork to see how tender they are getting.

TIPS for keeping beans good:  As a general rule, beans can get easily contaminated, so always use a clean kitchen utensil to scoop out amounts.  Also, they can be cooked ONCE, and then refrigerated up to 7 days safely.  Once you re-heat beans, they cannot be stored, they must be consumed because they will go bad if you re-re-heat beans...the gassy quality can return and you can get an upset stomach.  Always taste a set of beans before re-heating, they should taste good, not sour.

MASHED BEANS:  Just pour the desired amount of refrigerated  or just-cooked beans into a blender, add about a 4th of that amount in water and blend on high.  If you'll be reheating this to eat, then spray cooking spray or very lightly pour canola oil in a pan or pot to reheat.  Stir often and serve.

CANNED BEANS:  If you really want canned beans your whole life, you're asking for constant gas.  They are sometimes re-fried, which is not good either for you.  Remember, beans are very beneficial, but try to make a good habit of eating them fresh and healthy.

Apr 12, 2011

Napolitan Flan

This recipe was given to me by my mother and is quite simple.  She says it's also common for Latina women to make flan this way.  It is called Napolitan Flan because than flan itself uses only 3 ingredients.  I for one, LOVE flan!

 YOU WILL NEED
3 eggs
1 can of condensed milk
1 can of evaporated milk
Molasses or Brown Sugar ( I uses the brown sugar because I don't have molasses right now.
Vanilla Extract (optional)
Blender
2 ovenware pans, one small round or small square along with a bigger rectangular one (one needing to FIT inside the bigger one, could be glass or metal for either)
Cooking Spray

MAKE IT
1.  Preheat oven to 350 degrees Fahrenheit.  In the blender, whip up the eggs, and both cans of milk until the top is frothy.  (Optional)You can also add a teaspoon of vanilla while mixing.
2.  Spray the smaller ovenware lightly on bottom and all sides and then sprinkle the brown sugar in a light layer OR drizzle Molasses as evenly as possible.
3.  Pour in your blended and and whipped mixture of the flan and set this small ovenware inside the empty,non-coated and bigger ovenware.  Very gently, fill in the rest of the free space with water from your sink with a cup until your flan lightly floats or is is about to fill up the larger ovenware.
4.  This part is tricky: Pick up the water-filled and flan-floating ovenware and place in the middle of your oven rack.  Let it cook for 40 minutes to an hour checking every 20 minutes, it all depends of the amount of water used, material, and shape of your pans.  The top will become a deep brown, it's ok.  This is not going to be seen and the bottom will be...you'll see.
5.  Finally, remove your floating flan from the oven with the larger ovenware still underneath.  Gently lift the flan off an let it cool for 30 min or more.  Make sure it's not hot for the next step.
6.  Grab the big sih you'll be serving this from and lay it upside down and on top of the flan still in the small ovenware and while holding it tightly, flip it around to let the flan slide off onto the platter or plate.  Now, serve.
Buen provecho! Enjoy!

Mar 5, 2011

Mexican Enchiladas with homemade sauce.

I thought I had posted this recipe when I looked through my pictures to clear out space on my computer, but I haven't so here goes!

I got this recipe from my mother, who learned it from her family, who learned it from...you get the point.  My mother is Mexican and my father is Salvadorian, so the food I eat is nothing like the American imitations you find in stores or restaurants, in fact, I really dislike expensive Mexican restaurants.  I know, I know, I love almost everything life gives me, but that food is just a cheap alternative to create mass production.  Luckily, I can cook, right?  My husband loves my enchiladas and the sauce...even told me the other day, after he took a bite from his mom's enchiladas, leaning close to say,"Yours are way better, these need some sour cream or something..." Shhh!  She must not know though, because she works a lot and I recognize that she has other strengths.  It made me quite proud, oddly, I don't like pride very much, it's huge and gets in the way of seeing things right.  So, before I start with the delectable recipe, I must tell you a story.

STORY TIME!  So, there I was going out for a jog in the streets when....nah, nothing like that, but more about food and why I know what I know.  I can cook many traditional and typical Mexican and Salvadorian foods like pupusas, enchiladas, chillaquiles, gorditas, pan con chumpe, platanos fritos, etc.  My mother taught me everything, unless otherwise noted, starting at the age of 12.  I spent a lot of time before dinner mostly in the kitchen before I went to college for years.  She knows how to cook Mexican because of her mother and knows Salvadorian dishes because of my father's older relatives and some friends.  Well, I was the eldest of eight kids growing up and I sometimes altered the recipes to make things more convenient, cut down on time, and just because I was lazy.  Now, I appreciate the flavors and richness that cooking from scratch brings.  There is no comparison!  Most of all, nothing compares to a meal you make at the heart of your home, not even a $50 plate...believe me, you can make everything yourself that you can buy from a restaurant and still keep the rest in your pocket or just make a feast from scratch out of $50 dollars.

Now, the enchiladas.  note that the sauce itself takes about 2 hours.  It's so worth it!

YOU WILL NEED
Chicken, cooked and hand shredded
Tortillas
Mozzarella Cheese
Cheddar Cheese (traditionally Monterrey Cheese is used, but that's a little more fat)
Onion, diced very small
Green pepper, sliced long, but short enough to fit in a tortilla
Cilantro
9x13 glassware for oven or a square one
FOR THE SAUCE
2 tomatoes
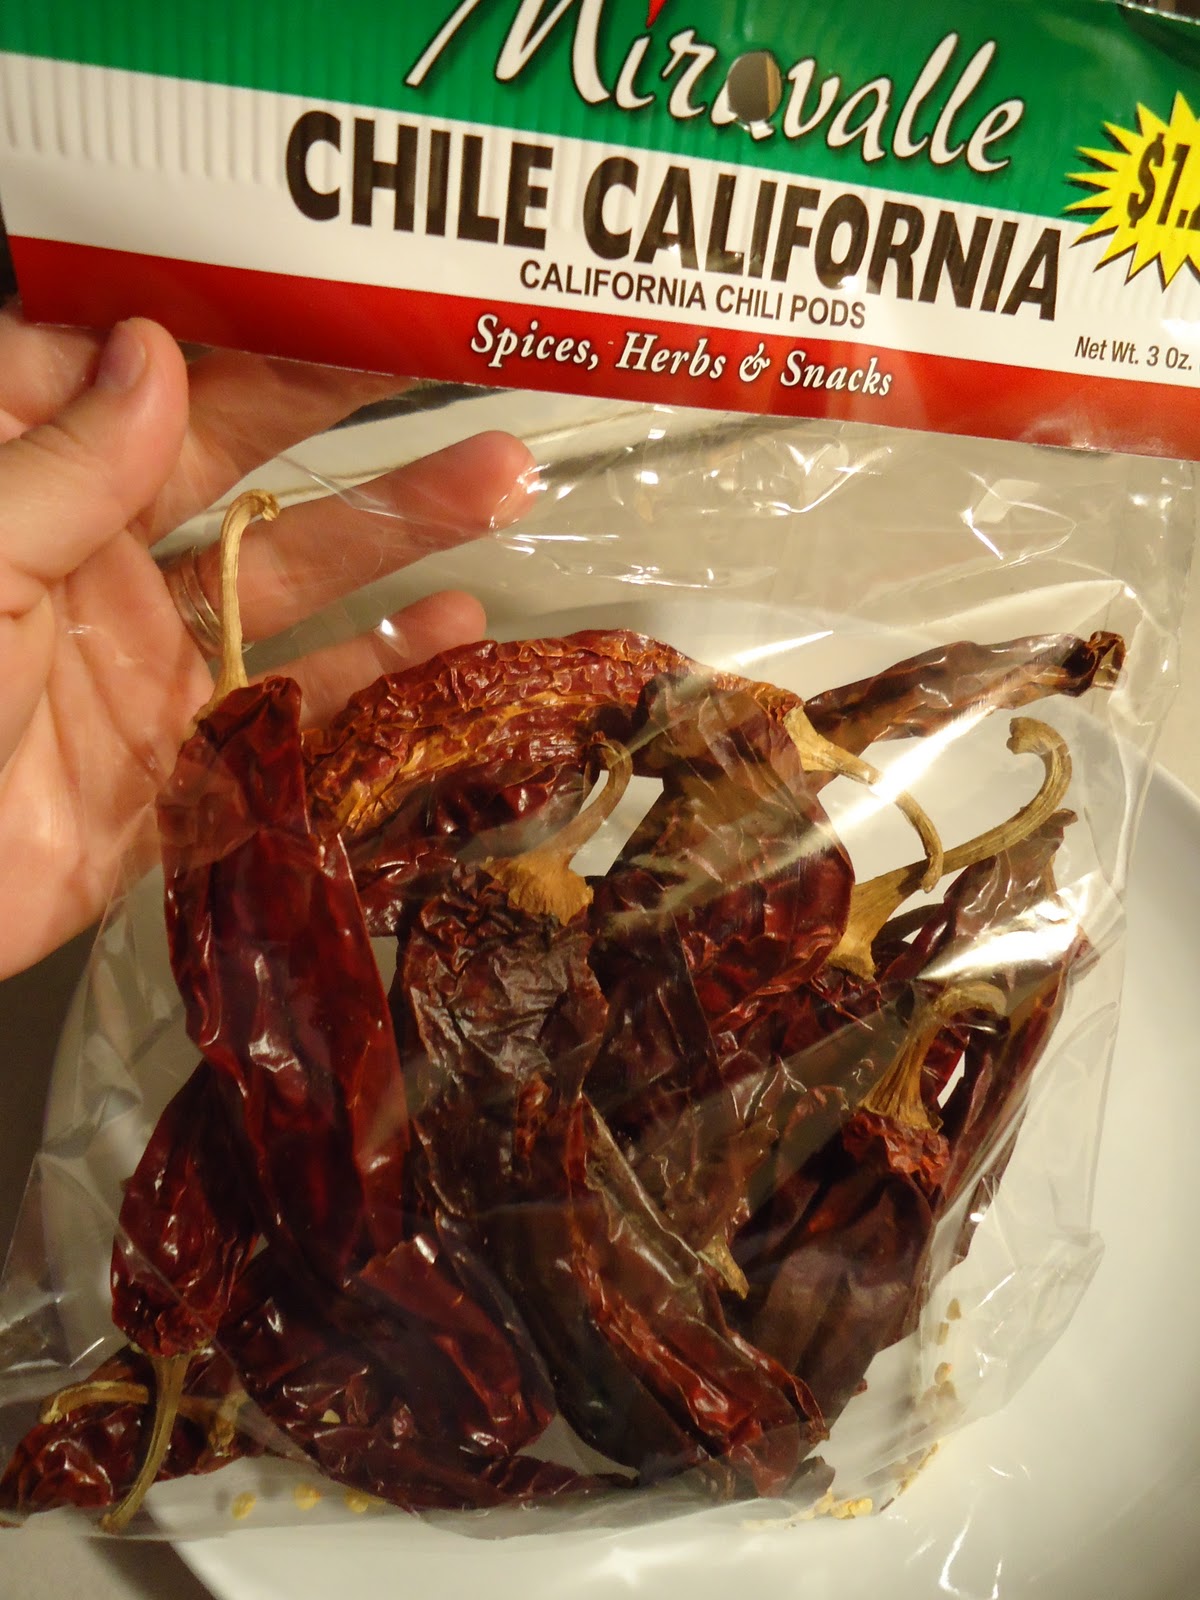
2 California Chillies, dried and cleaned out from the seeds(I don't like spicy food because it makes my stomach super upset)
1 big garlic clove
salt
Corn starch, about 1/2 tablespoon
3 cups water
Blender (preferably plastic, but a if you have a glass one then place it near or on top of the stove while you cook)

MAKE IT
1.  Start with the sauce.  Boil 2 cups water and clean out the chilies.  No seeds!  Cut them open vertically and rinse under warm water.  Now place in already boiling water for about 20 min.
2.  Remove the boiled Chile and water from heat and let cool to a warm temperature.  In a blender(preferably plastic), place halved tomatoes (2 whole), one garlic clove, 1 teaspoon salt, and pour in the boiled chili and water (if the blender is glass, it might crack [it happened to me!]unless you placed it near the stove while it was on).  Finally, add about 1/2 tablespoon of corn starch and blend until chili chucks are no longer visible and everything has blended thoroughly well.
3.  Boil this sauce on medium for 90 minutes(1hr & 1/2), stir occasionally to prevent bottom of sauce sticking to pot and cooking evenly everywhere.  Don't raise heat to speed up process because it will bubble and make a stingily mess.  Check after time is up and if you want to still have a better flavor, then continue cooking for another 30 min.  If not, turn off heat and let it sit while you prepare the rest.  It will start to thinken quickly.  Now, spray the rectangular ovenware with cooking spray, lightly.
4.  Warm up your tortillas in the microwave or toaster oven to prevent cracked, rolled enchiladas and to wrap better.  Slice long pieces of cheese.  Place the green pepper, onions, and shredded chicken horizontally close to the edge and roll, not tightly, but smugly.

5.  Place the tortilla inside the ovenware with the open flap face down.  This will keep your contents inside while you repeat filling in the tortillas until you finish filling your ovenware.
A few tortillas cracked bc I left them waiting too long to be rolled. 
6.  Now, check that your sauce isn't too thick yet because you need to pour it evenly over the tortillas.  It needs to completely soaked so coat every inch of the rolled tortillas, otherwise it's just not an authentic dish and your flavors won't be encompassing every bite.  It's good to have a thin layer of this sauce drip down into the pan too to cover both sides of this delicious dish.

7.  Usually I shred cheese on top, but I cut out too much cheese up so I placed then on top each enchilada.  Now, lightly toss some cilantro on top of everything.

8.  Cover with aluminum foil and place in a 350 degree oven for 20 min.  Just enough for everything to soak up the flavors of your super tasty enchilada sauce.


This set of enchiladas are from the day after...my hubby took original enchiladas out quick when he heard the bell and devoured them...fast!  So, the sauce here was thick from being in the fridge overnight and I guess I didn't heat it up enough to make it pourable.

9.  Now remove and use a spatula to serve to individuals.  There will be sauce in your pot still, but store it in a airtight container for next time, or use it for Chilaquilles, or Pizadillas...yummy!  Watch out for spills because this sauce can really stain, like spaghetti sauce.

You can serve this with a side of beans, or rice, or both.  Hugo (my starving husband) just eats them by themselves...up to 8...in one sitting.  I recommend eating less than that though ;-)  Taste your masterpiece!

Buen provecho! Enjoy this real Mexican dish!

Feb 10, 2011

Homemade Banana Bread(healthy)


When I bake, ocassionally, I do actually keep measurements pretty accurate because I've noticed that pinching here or adding there just doesn't cut it when baking.  So, I actually put in measurements this time.


YOU WILL NEED
1 cup sugar(I prefer brown)
3 ripe bananas, mashed (ripe bananas are pretty dark and soft and sweeter, look at my picture to have an idea of what you should be looking for)
1 6oz jar baby food(any fruit), or the oil you use, but baby food is healthier, so substitute, commit.
1/2 cup egg substitute (or 2 egg whites, and one egg yolk)
2 cups all-purpose flour (I used enriched wheat)
1/2 teaspoon salt, or a gentle squeeze of lemon(optional, a good friend of mine told of this once[lemon]and it adds pizzaz)
1 teaspoon baking soda
1/4 cup finely cut walnuts (optional)(My hubby doesn't like them, but I love them, but compromise, compromise, right?)
Electric mixer, or really fast hands
A large, deep bowl to mix ingredients


MAKE IT
  1. Preheat oven to 350 degrees feirinheit.  Prepare a 9in loaf pan by lightly spraing with cooking spray.  I sometimes use a drizzle of EVOO and wipe around with a napkin or paper towel, making sure I get the corners.
  2. In a deep and large bowl, use the electric mixer to combine the sugar, mashed bananas, baby food, and egg substitute(or egg white and egg yolk).  Beat on medium speed until it all well blended.
  3. Add the flour, salt, and baking soda.  Start at low speed and gently speed up to beat with the electric mixer until it all mixed well together.
  4. If your adding nuts, fold them in now, with a spatula, not the mixer.
  5. Pour your batter into the already prepared baking dish and place in the center of oven for 40 to 45 minutes.  Poke with a toothpick or kabob stick near the center of the bread and make sure it comes out clean without sticky residue.
  6. Let it cool for about 10 minutes, then remove while it's warm, not hot and place on a rack or paper towel atop a large plate and continue to let it cool.
That's it!  You cut down on loads of calories, believe it or not.  It's completely fat-free if you ommit the nuts, but almods have a good type of fat for your body, so opt for those if you can.

Buen provecho! Enjoy!

Feb 9, 2011

"Cake Pops"

I'm sure you've seen this surface into popularity recently....if not, then your missing out!! These are small cake balls covered in your choice of chocolate and decorated too!  I have did not take pictures of a few I tried making for home because I had lost my camera momentarily, but they're pretty easy to make and delicious.  Wacth out on how many you eat though, so share.  Also, to cut on fatty-intake, substitute oils with puried apple sauce(natural-like baby food) or any other puried baby food flavoring except strong tastes like carrots, sweet potatoes, meal mixes, or any veggies.  Just fruit, pureed fruit.  So, if the recipe calls for 1/2 cup oil (4oz) then pour in 4oz of pureed fruit.  It always works, I guarantee it!  Plus, your flavors won't be affected as long as you don't use a strong ingredient. Remember, there are 8 oz in every cup, so make the math.  Here's one good recipe for making Cake Pops.

I found pictures online and wanted to share them with you to get some ideas flowing...


...make a bouquet, from Etsy shop.


...from Candy Valley Cake Company


...or keep it simple from Bonappetit


...from Cake Pop Co.


...if you're really advaced and have the tools, from Festivals and Shows


...from Wedding Bee


...from Holidays Ville


...a no-bake molding and tutorial, from My Little Cupcake Blog


Well, I truly hope this inspires you to get up and start making a treat for those you love and surround you!

Feb 3, 2011

Tasty Mexican-style Chicken, Potatoes, and Quesadillas

Well, I just couldn't wait any longer to post another recipe! Note that I boiled the potatoes beforehand in water with a little salt for about 20 minutes. The best way to cook this is by boiling the water first, while chopping potatoes, then gently adding them in after water has boiled. BTW- Quesadillas are mistaken often for only being tortillas with cheese in between, not so, bc quesadillas refers to any type of tortilla surrounding a mostly-cheese center.  Also, I ration everything for 3 people, unless stated otherwise, and this is a healthier and less seasoned version than most recipes, so to say, MY home-cooked STYLE ;-)

YOU WILL NEED
Drained and Boiled potatoes, not cooked all the way yet. Sweet potatoes are healthiest, but I used russet bc they were on sale (1 med sized for every 2 people)
Chicken meat, skinless and boneless, cut into ~1 1/2 x 1/2 in pieces (Thigh meat is cheaper,cut off excess fat and rinse/pat dry, then rub salt into chicken pieces)
1/2 an onion, thinly sliced
1/2 green pepper, sliced and diced
Tomatoes, diced (~2 Roma)
Chopped fresh Cilantro or dried
Mozzarella Cheese
Salt
Cumin
EVOO (Extra Virgin Olive Oil)
Non-stick Spray
Big Round Tortillas (I used flour, again on sale, but Wheat is healthier)
Balsamic Vinaigrette (or Apple cider vinegar)
Large non-stick pan
Oven-safe glassware
MAKE IT
1.    Place pan in high heat & spray large skillet-style pan with non-stick. Bring down heat after and add sliced onions, while they cook slowly add EVOO on lower heat setting so onions don't stick until bottom of pan has a thin layer of EVOO. Jumping oils are NOT good (it's toxic), the heat may be too high, lower it bc EVOO can't keep it's molecules together with intense heat, you want something healthy right? Remember that you are sauteing, not frying.
2.   Once onions are almost translucent (not solid white anymore) add the green bell pepper. and add the salted chicken pieces. The heat should be set to medium-low, or as long as your oil is not smoking or jumping, but cooking your food.  Your chicken will start to soak up all the delicious flavors around it especially bc you cleaned it good so it's pores are open, it'll also excrete chicken "juices" into the pan.  Preheat your oven to 350 degrees Fahrenheit.
3.   Add a pinch (literally) of cumin powder along with the diced tomatoes and mix.  Let it cook and move it every 5 min or so while it caramelizes all over.  Mm, great smell, huh?  Meanwhile, get your boiled potatoes and set into your glassware.  Keep your empty, but warm pot on top of an "off" burner.  Pour in the balsamic vinaigrette(or apple cider) with a ladle bc you need to make sure all the cooked potatoes soak a little bit of this until your bottom has a thin layer.  Add 1 tablespoon of balsamic or cider to your cooking chicken with ~1 teaspoon cilantro and stir.
4.   Cover your potatoes with foil and place in central part of oven for 20-25 minutes.  Poke with a fork to see that potatoes are cooked all the way and are soft, not mushy or hard.  Turn off oven, but leave potatoes inside...
5.   Go back to your chicken, it should be caramelized and juices/flavors are wrapped around your food, now transfer it over to the pan that was boiling your potatoes earlier and set to low heat, this will add a darker outer layer to your chicken, but not burn it.  Leave the remaining yummy oils in pan and start warming up a tortilla on it set ti high heat.

6.   Turn over tortilla (to make it look so golden, gently stir it around the pan to let it absorb flavors and colors).  Bring out potatoes and uncover.  Sprinkle ~1/2 teaspoon Cilantro and add mozzarella cheese pieces randomly (not too much bc it'll bulk into a ball), and gently fold in into the rest of the cooked potatoes. 
7.   Add Mozzarella cheese to the center (in a line) of the tortilla and fold in thirds, keeping the open fold cooking under first.  Then turn over and cook just enough to let cheese inside melt.

8.   Now serve everything.  Buen provecho!

Jan 31, 2011

It's been a while!

So, aside from making excuses of why I haven't gotten around to getting on here to write, I've really been making 2 other blogs!  One is for my music business and the other for exposing my photography and to reach potential clients.  I've been better at posting and updating things on facebook too.  It's been pretty intense around here with the my little boy growing up and just being so very active.  Well, so far, so good!  Still, cross your fingers.

Well, I was thinking a lot about my personal blog(this one) and thought to myself that I need to start sharing what I can make and create.  I'm a pretty culurally rich person as is because of my ethnicity, which I'm very proud of being a part of, and I can share so much of what my mother has taught me! I want to share it with everyone, so here goes! 

Keep in mind that I have tweeked these a bit to cut down on making things simpler and healthier in most cases.

First off, Mexican Chillaquilles!!!
YOU WILL NEED
Large non-stick squillet/pan
Pam Spray (or any non-stick)
Eggs (2 per person)
Tortillas (1 per egg)
Green Bell Pepper (about 1/3 of the whole veggie)
Tomatoe Sauce (Opt for a Organic Marinara)
Salt
Pepper
Mozarella Cheese
Cheddar Cheese
Cilantro (fresh or dried)

MAKE IT
  1. Set your pan to high heat and spray with the your cooking spray.
  2. If you are adding the green bell pepper, first sautee them lightly just enough for them to start releasing their aroma into the air and then add the eggs.  Scramble your eggs. I start with 6 because I'm feeding 3 people, including myself, of course :-)
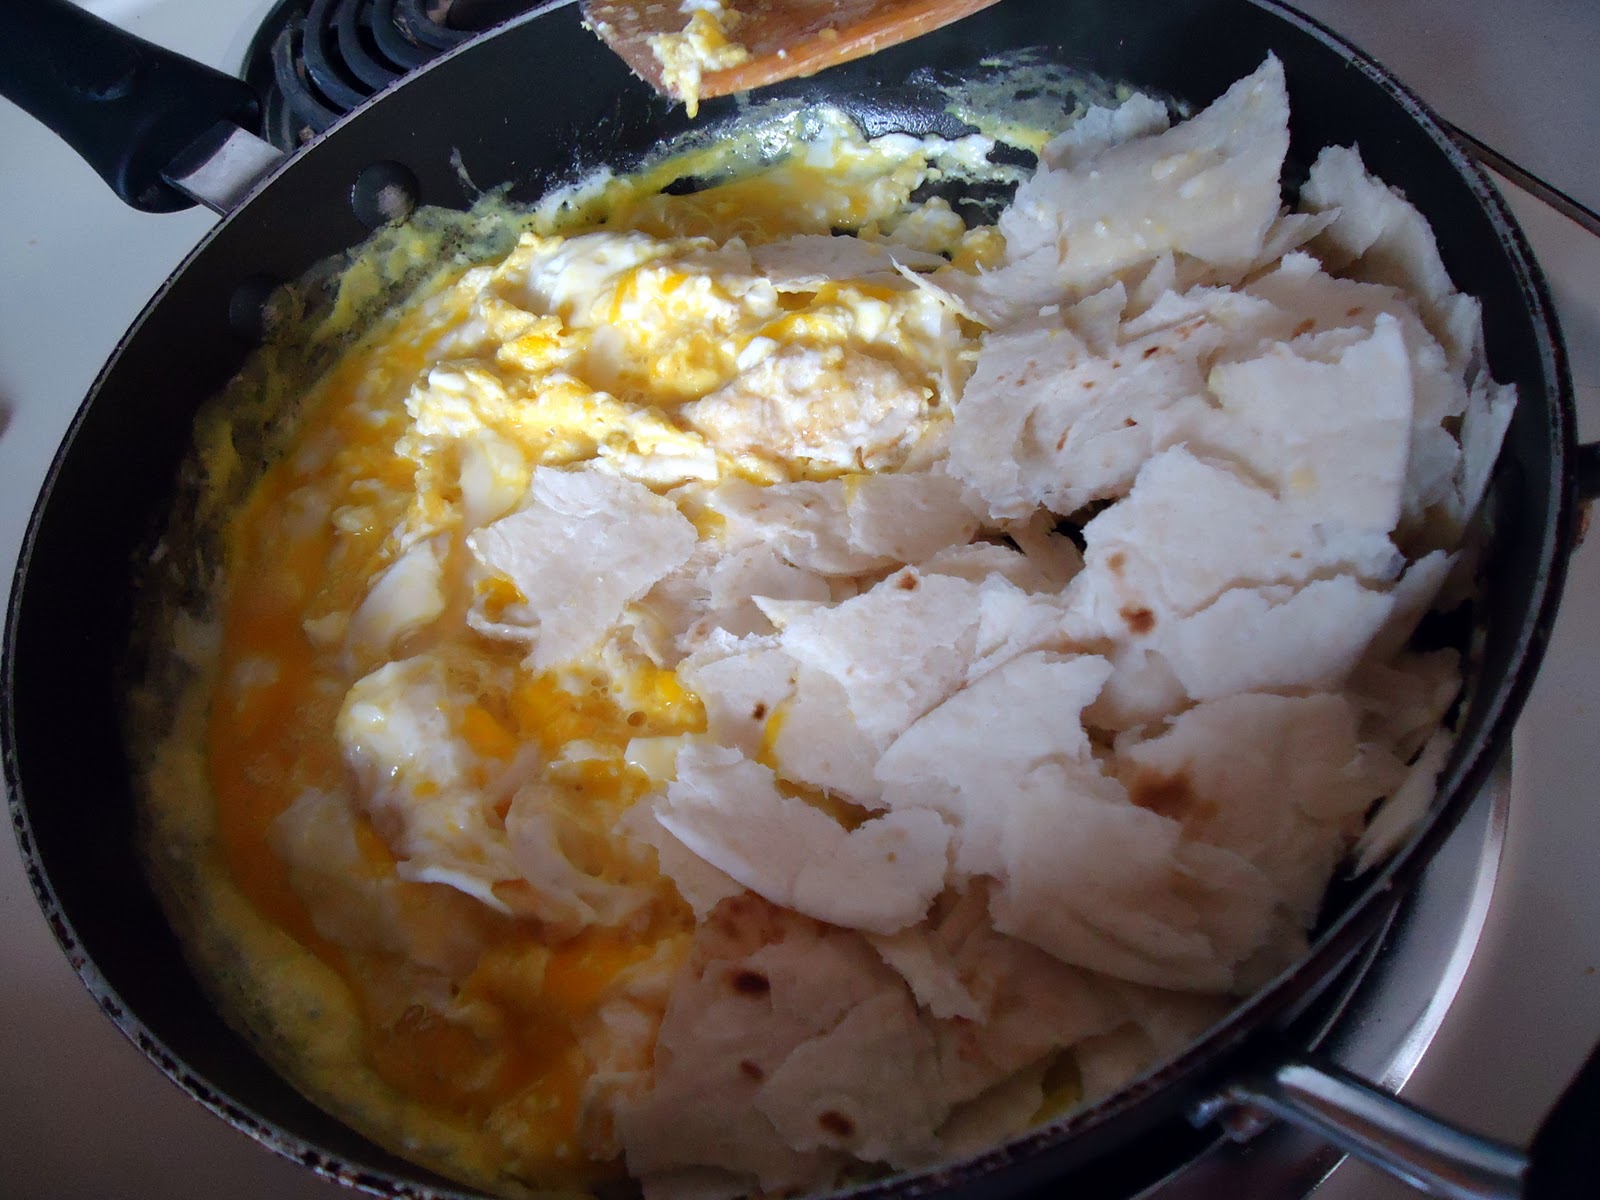
  3. Once your eggs are halfway cooked, hand-shred your tortillas and throw them in with the cooking eggs.
  4. Stir them together.  Make sure your eggs stick to your tortillas strips.
  5. Add the sauce. Just eyeball it.  I would say about 1/2 a cup for every 2 eggs that you used if you really need a measurement.  If you're not using marinara, then add about 3 pinches of salt, or salt to taste.  Don't overdue it because you won't be able to tone it down later.  Add a dash of pepper too.
  6. Mix it all well, making sure nothing is sticking to skillet.  If it's starting to look dry, such as not juicy at all, then add 1/4 or so of water.  You want to keep those tortillas moist and not stiff and hardened. Soft, not saturated.
  7. Add the mozzarella cheese and cheddar, according to what you what you would like more of.  Again, eyeball it because this is going to melt into your dish.
  8. Stir ingredients continually especially now because you don't want your cheese to stich to the bottomw or start stiffening up or getting crispy. 
  9. Add your dried or fresh cilantro, this adds to the overall taste.  Now serve hot.
  10. I added taters because I like to eat this for breakfast with my little man and husband.
Buen Provecho!  Enjoy!

LinkWithin

Related Posts Plugin for WordPress, Blogger...